Good morning! I have a little tutorial to share with you today to create your own Halloween decor - perhaps a spooky sign for your front door? The "Glowing" collection by Authentique Paper is perfect for all your Halloween home decor and now is the perfect time to get creating! Take a look at my "Happy Haunting" sign:
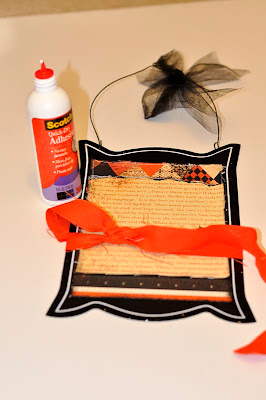
I picked up this black metal sign at my local Michael's a couple weeks ago (and I'm so proud of myself for using something I bought right away - admit it, you do it too!) :) I tied some black glitter tulle in a bow on the top on the wire hanger.
To distress my patterned paper, I simply used some black paint and a foam brush.
Once that was dry, I machine stitched around the edges for a little extra texture.
I used a wet adhesive to adhere the patterned paper to the metal sign and then tied a piece of orange ribbon around the front of the sign in a knot. I also glued a die-cut piece from the "Glowing" Icons sheet to the bottom.
Next, I cut a piece of this mirrored sprig that I found in the Christmas section at my local Hobby Lobby. It was black and silver so it went with this project perfectly.
I hot-glued the sprig (that ended up looking like a really cool tree) to the bottom of the sign.
The ghost was cut from a Halloween pick that I bought at Hobby Lobby and hot glued to the center of my tulle ribbon. The little "Boo" die-cut is from the "Glowing" Noteables sheet.
And here's the finished piece again!
A couple close-ups....
Boo! :)
Supplies:
Authentique Paper: Glowing Patterned Paper (Newsprint, Harlequin Patches); Icons Front; Noteables Front; Headline Front
Michael's metal sign
Black glitter tulle
twine
black paint
assorted Halloween "floral" picks
Jenni Bowlin button
Thanks for checking out my tutorial! All of us at Authentique Paper would love to see your spooky creations! :)


That is one super-cute sign, Jill!
ReplyDelete